ArtsAutosBooksBusinessEducationEntertainmentFamilyFashionFoodGamesGenderHealthHolidaysHomeHubPagesPersonal FinancePetsPoliticsReligionSportsTechnologyTravel

How to Photograph Food with Your Android or iPhone: Tips and Apps for the Home Chef
Updated on September 13, 2012
Source

Food Photography Should Be Appetizing

Nothing is more unappetizing than food poorly photographed. The proliferation of food blogs and sites like HubPages give chefs a platform for sharing great food. The opportunity to share and connect over otherwise delicious food is undermined by outright awful photos. Poor food photos abound.

The good news is that it's easy to do appealing, authentic food photos with a few simple tips, an Android or iPhone, and two (free) apps: Instagram and Color Effects. Here's how in 3 easy steps.
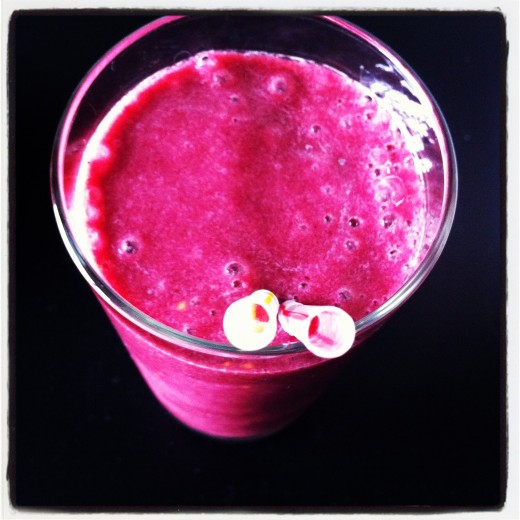
The angle slightly above glass level allowed me to look down the straw of the Blackberry-Kiwi smoothie and draw in the reader.
The angle slightly above glass level allowed me to look down the straw of the Blackberry-Kiwi smoothie and draw in the reader. | Source
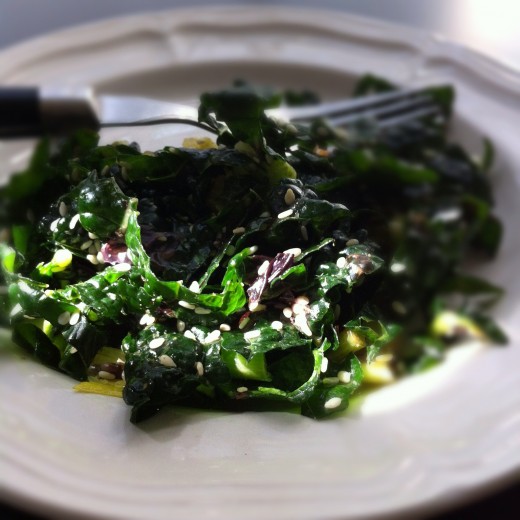
Sautéed kale photographed on my desk where natural light and beam of sun light the texture of the otherwise dark and shadowy kale.
Sautéed kale photographed on my desk where natural light and beam of sun light the texture of the otherwise dark and shadowy kale. | Source

Step 1: Stage Your Photo Properly

Before you take any photograph of your finished food, there are a few simple tips to consider.

  • Lighting: Take your photo in natural light. Everything else that you do to make your photograph look appetizing will be destroyed by poor, artificial lighting. I rarely take my food photographs in my kitchen which has artificial light. My preferred spot is in my living room on my coffee table which gets loads of natural light. Natural light also means natural shadows.
  • Angle (food level not bird's eye): Too many amateur food photographers take their pictures from standing directly above the food. This doesn't draw in the reader. Take your pictures from food level or slightly above the plate.
  • Use Props: You don't want to clutter your photo, but using the right prop can improve the setting for your food. A fork sitting in the vegetables, a few crumbs next to the cake, a glass of red wine behind your steak. Props enhance your setting.
  • Prep before, shoot quickly: Do all of the above before the food is done. Once the food that is your subject is finished cooking, you want to photograph it as fast as possible before it starts to cool, melt, jiggle, settle, etc. Food looks its best immediately after its cooked. If you get your set prepped with the above tips before the food is ready, you can slip the food on set, shoot, and move on. It even helps to use a stand-in and take a few sample photographs beforehand so that you can test your settings and work out the kinks.
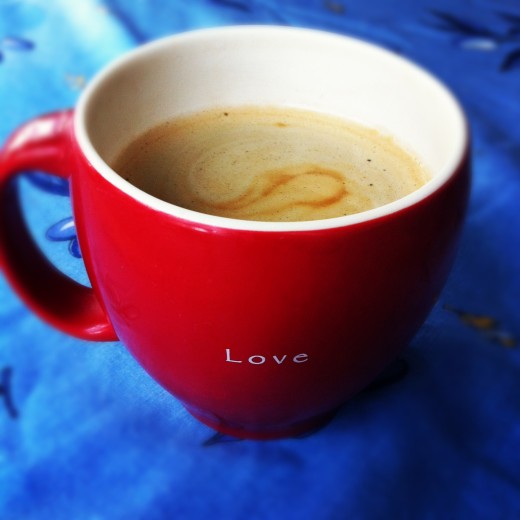
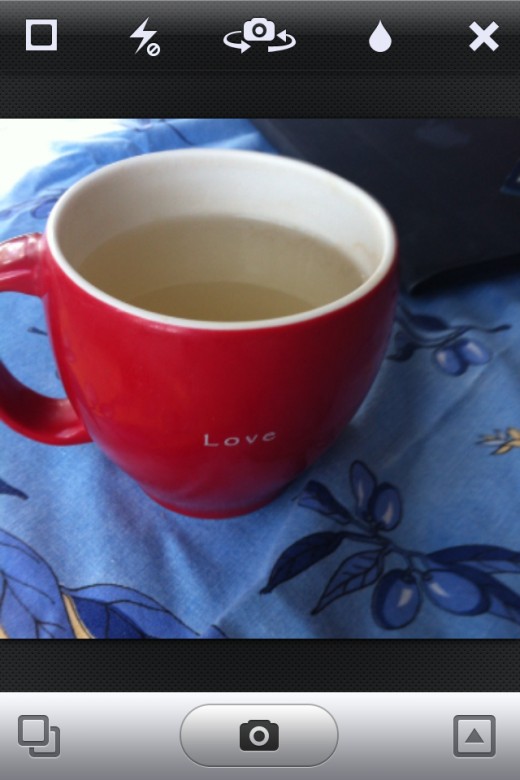
This photo was staged and practiced several times with colored water before the coffee was brewed. You can see a few practice attempts in the Instagram screen shots below.
This photo was staged and practiced several times with colored water before the coffee was brewed. You can see a few practice attempts in the Instagram screen shots below. | Source
Click thumbnail to view full-size
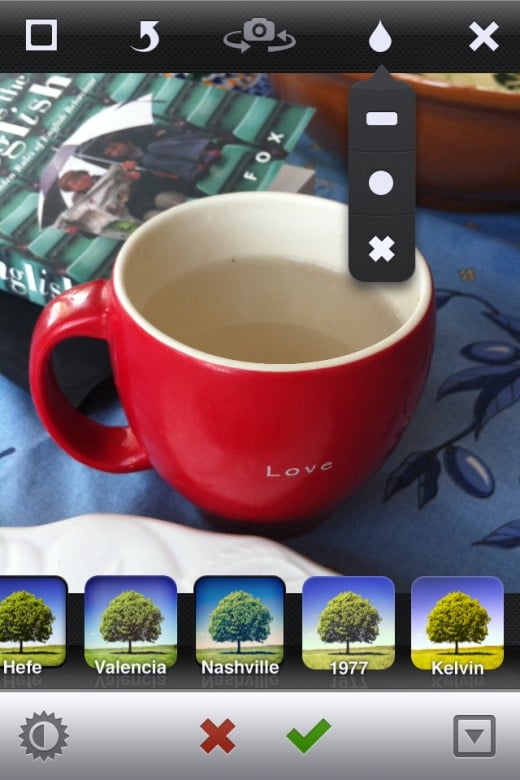
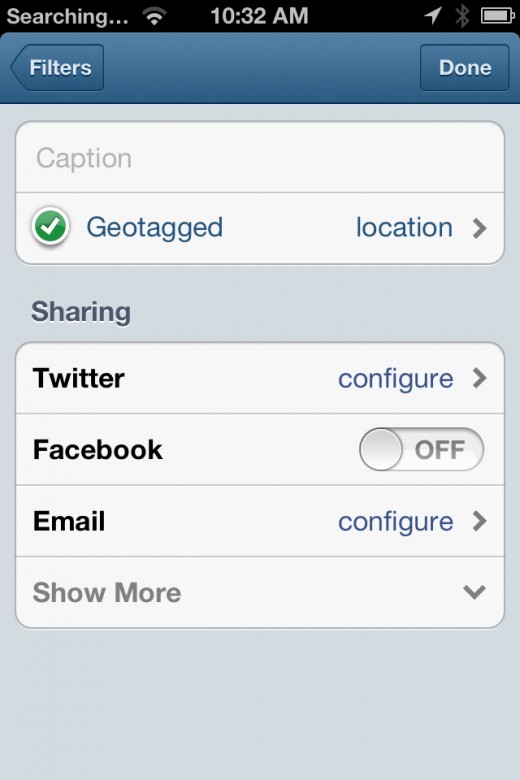
A screen shot of Instagram as your camera.After you take your photo, you can apply any of 18 filters (bottom) or blur effects (top).Final step: click "Done." The rest is optional unless you wish to share your photos with others in the Instagram Community.
A screen shot of Instagram as your camera.
A screen shot of Instagram as your camera. | Source
After you take your photo, you can apply any of 18 filters (bottom) or blur effects (top).
After you take your photo, you can apply any of 18 filters (bottom) or blur effects (top). | Source
Final step: click "Done." The rest is optional unless you wish to share your photos with others in the Instagram Community.
Final step: click "Done." The rest is optional unless you wish to share your photos with others in the Instagram Community. | Source

Step 2: Use Instagram to Take Your Photo

When you are ready to take your photo, open Instagram on your iPhone or Android phone. Do not use the phone's built-in camera. To take your photo do the following:

  1. Touch the camera at the bottom center of Instagram to initialize the camera.
  2. Touch the camera icon at the bottom center to take the photo (photo 1 at right).
  3. Scroll the list of 18 light filters across the bottom of the screen to select a filter that most makes your food look authentic. The light filters provide differing effects that modify the saturation and contrast of your photo and can improve the lighting of your subject (photo 2 at right).
  4. Apply a linear or radial blur effect to bring your subject into focus. The blurs are in the teardrop menu at the top of the screen. Use two fingers to change the size and position of the blur (photo 3 at right).
  5. Touch the green checkmark to save your photo (photo 3 at right).
  6. Click Done on the final screen. Your photo is uploaded to Instagram, but it is also saved to the Photos on your phone (i.e. on iPhone it's in Photos > Camera Roll).

Example: New York Steak with Instagram, Valencia Filter and Radial Blur
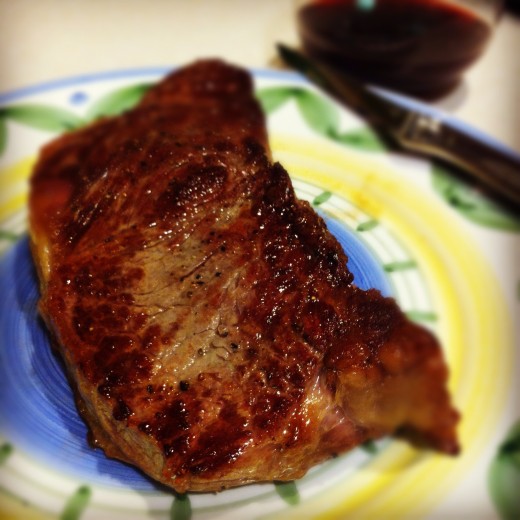
I took this photo of my new york steak for my Hub, "How to Make the Perfect Steak," with Instagram, applied a radial blur to focus on the texture of the steak, and the Valencia filter to correct the lighting from my kitchen at night.
I took this photo of my new york steak for my Hub, "How to Make the Perfect Steak," with Instagram, applied a radial blur to focus on the texture of the steak, and the Valencia filter to correct the lighting from my kitchen at night. | Source
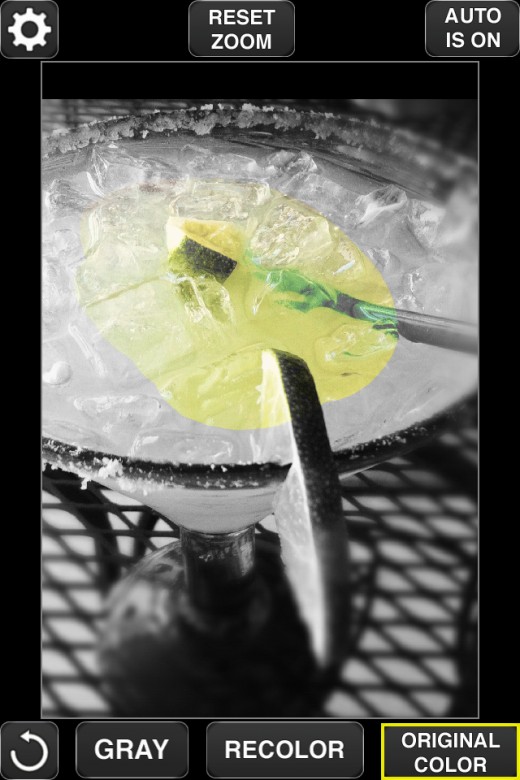
A screenshot of Color Effect to re-color parts of your photo in the original color. This version is the $0.99 advertising-free version, Color Effects Pro.
A screenshot of Color Effect to re-color parts of your photo in the original color. This version is the $0.99 advertising-free version, Color Effects Pro. | Source

Step 3: Use Color Effects For Rich Focus on Your Food

The app Color Effects enables you to use your fingers to color only a portion of your photo. This app is free, or if you want the version without advertising, you can buy it for $0.99. To use color effects do the following:

  1. Open Color Effects and touch "Photo from my Photo Library."
  2. Select your photo from your list of photos.
  3. Select Original Color at the bottom to re-color portions of your photo back to the original color.
  4. Use your fingers to color like a child.
  5. When you are finished, click the Cog at the top left corner, and click Save to Photo Library to save your photo.

Example: The New York Steak with Color Effects

I opened the original Instagram photo saved in my iPhone Camera Roll in Color Effects. Using Color Effects, I re-colored the original color of the steak back into the photo.
I opened the original Instagram photo saved in my iPhone Camera Roll in Color Effects. Using Color Effects, I re-colored the original color of the steak back into the photo. | Source
working

This website uses cookies

As a user in the EEA, your approval is needed on a few things. To provide a better website experience, hubpages.com uses cookies (and other similar technologies) and may collect, process, and share personal data. Please choose which areas of our service you consent to our doing so.

For more information on managing or withdrawing consents and how we handle data, visit our Privacy Policy at: https://corp.maven.io/privacy-policy

Show Details
Necessary
HubPages Device IDThis is used to identify particular browsers or devices when the access the service, and is used for security reasons.
LoginThis is necessary to sign in to the HubPages Service.
Google RecaptchaThis is used to prevent bots and spam. (Privacy Policy)
AkismetThis is used to detect comment spam. (Privacy Policy)
HubPages Google AnalyticsThis is used to provide data on traffic to our website, all personally identifyable data is anonymized. (Privacy Policy)
HubPages Traffic PixelThis is used to collect data on traffic to articles and other pages on our site. Unless you are signed in to a HubPages account, all personally identifiable information is anonymized.
Amazon Web ServicesThis is a cloud services platform that we used to host our service. (Privacy Policy)
CloudflareThis is a cloud CDN service that we use to efficiently deliver files required for our service to operate such as javascript, cascading style sheets, images, and videos. (Privacy Policy)
Google Hosted LibrariesJavascript software libraries such as jQuery are loaded at endpoints on the googleapis.com or gstatic.com domains, for performance and efficiency reasons. (Privacy Policy)
Features
Google Custom SearchThis is feature allows you to search the site. (Privacy Policy)
Google MapsSome articles have Google Maps embedded in them. (Privacy Policy)
Google ChartsThis is used to display charts and graphs on articles and the author center. (Privacy Policy)
Google AdSense Host APIThis service allows you to sign up for or associate a Google AdSense account with HubPages, so that you can earn money from ads on your articles. No data is shared unless you engage with this feature. (Privacy Policy)
Google YouTubeSome articles have YouTube videos embedded in them. (Privacy Policy)
VimeoSome articles have Vimeo videos embedded in them. (Privacy Policy)
PaypalThis is used for a registered author who enrolls in the HubPages Earnings program and requests to be paid via PayPal. No data is shared with Paypal unless you engage with this feature. (Privacy Policy)
Facebook LoginYou can use this to streamline signing up for, or signing in to your Hubpages account. No data is shared with Facebook unless you engage with this feature. (Privacy Policy)
MavenThis supports the Maven widget and search functionality. (Privacy Policy)
Marketing
Google AdSenseThis is an ad network. (Privacy Policy)
Google DoubleClickGoogle provides ad serving technology and runs an ad network. (Privacy Policy)
Index ExchangeThis is an ad network. (Privacy Policy)
SovrnThis is an ad network. (Privacy Policy)
Facebook AdsThis is an ad network. (Privacy Policy)
Amazon Unified Ad MarketplaceThis is an ad network. (Privacy Policy)
AppNexusThis is an ad network. (Privacy Policy)
OpenxThis is an ad network. (Privacy Policy)
Rubicon ProjectThis is an ad network. (Privacy Policy)
TripleLiftThis is an ad network. (Privacy Policy)
Say MediaWe partner with Say Media to deliver ad campaigns on our sites. (Privacy Policy)
Remarketing PixelsWe may use remarketing pixels from advertising networks such as Google AdWords, Bing Ads, and Facebook in order to advertise the HubPages Service to people that have visited our sites.
Conversion Tracking PixelsWe may use conversion tracking pixels from advertising networks such as Google AdWords, Bing Ads, and Facebook in order to identify when an advertisement has successfully resulted in the desired action, such as signing up for the HubPages Service or publishing an article on the HubPages Service.
Statistics
Author Google AnalyticsThis is used to provide traffic data and reports to the authors of articles on the HubPages Service. (Privacy Policy)
ComscoreComScore is a media measurement and analytics company providing marketing data and analytics to enterprises, media and advertising agencies, and publishers. Non-consent will result in ComScore only processing obfuscated personal data. (Privacy Policy)
Amazon Tracking PixelSome articles display amazon products as part of the Amazon Affiliate program, this pixel provides traffic statistics for those products (Privacy Policy)
ClickscoThis is a data management platform studying reader behavior (Privacy Policy)